skip to content
Random Musings Of A Bored Tenancy Cleaner
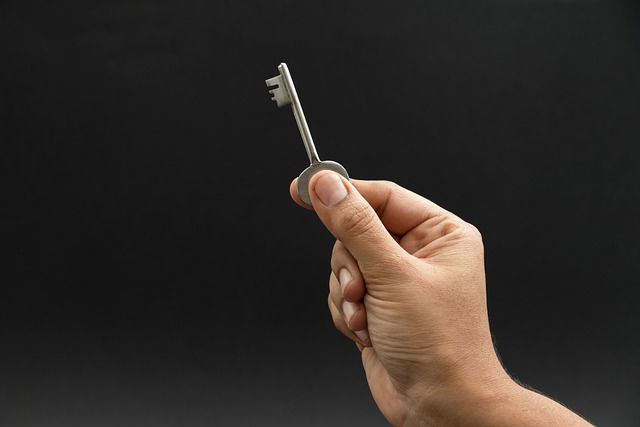
Why Dirty Properties Lead to Deposit Deductions: A Landlord’s View

The number one reason London tenants lose a part of their security deposit is cleaning-related. It might be failure to keep the rental property clean regularly or the inability to fulfill the end of tenancy cleaning clause. Either way, it is an exasperating issue for the majority of local landlords.

This article explores deposit deductions, their financial and legal ramifications for landlords, and common causes of neglect. It also provides practical tips on preventing these issues and steps for landlords to handle cleaning and repairs effectively. Understanding these aspects can help cultivate better relationships and ensure smoother tenancies.

Understanding Deposit Deductions for Dirty Properties

Understanding deposit deductions is extremely important for landlords and tenants, especially for unclean properties where cleaning standards can make or break the return of security deposits.

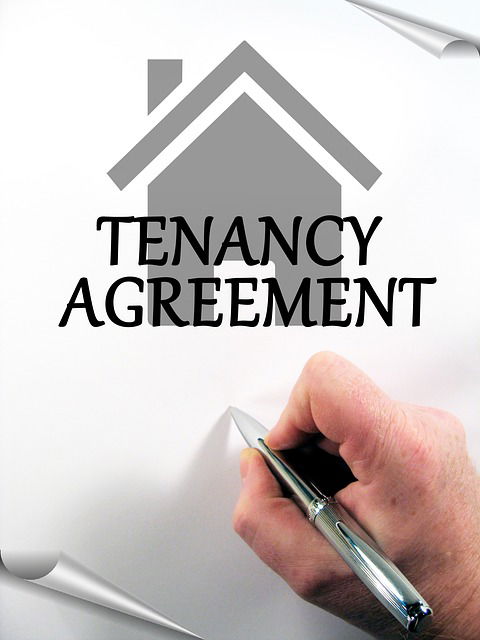
When you move out of a rented accommodation, landlords typically check the property’s condition against what is laid out in the tenancy agreement to see if any deductions need to be made. This can sometimes spark disputes over cleaning expectations, damages, and whose responsibility is what.

That’s why everyone must know their rights and obligations under the law.

What are Deposit Deductions?

Deposit deductions are those irritating amounts taken from your security deposit to cover cleaning, repairs, or damages that occurred as a tenant.

Understanding these deductions is extremely important if you’re renting a property because a little mismanagement could lead to some surprising losses. Common reasons for these deductions include needing extensive cleaning after you move out, repairs due to normal wear and tear, or damages that exceed typical use.

To help avoid these risks, keep things tidy and adhere closely to your tenancy agreement. Regularly discussing any maintenance issues with your landlord and keeping a record of the property’s condition when you move in can make a significant difference. Returning the property in good condition is key to avoiding unexpected financial penalties.

The Impact of Dirty Properties on Landlords

Dirty properties can hit landlords hard, impacting their finances and the overall value of their rental units.

When a rental doesn’t meet decent cleanliness standards, you might have to deal with increased tenant turnover, higher eviction rates, and those pesky extra maintenance costs just to get the place back in shape.

This can lead to more frequent property inspections, which can strain your relationship with tenants and interfere with rental compliance.

The Financial and Legal Consequences

The financial and legal consequences of keeping properties messy can add up. It could lead to increased liability, potential eviction processes, and even disputes over property damage between you and your tenants.

You might be surprised by how quickly repair costs can skyrocket due to neglect and dirt accumulation, which can seriously harm your property’s overall condition over time. If a tenant’s behaviour leads to unsanitary living conditions, those eviction fees and legal processes can add up faster than you’d think, draining your financial resources.

In these situations, you have legal obligations to address complaints or fix issues, making your responsibilities even more complicated and potentially opening you up to lawsuits. To keep these risks in check, having a well-drafted tenancy agreement that lays out cleanliness expectations and consequences can be a game changer. It helps protect you as a property owner while promoting a more responsible relationship with your tenants.

Common Causes of Dirty Properties

You might find that several common causes of dirty properties stem from tenant negligence and a lack of regular maintenance. This often leads to disputes over cleanliness and who is responsible for what.

Poor tenant behaviour, inadequate cleaning routines, and ignoring minor issues can accumulate, creating major cleanliness headaches for landlords to manage.

Understanding these causes is crucial for preventing future problems and keeping the property in good condition.

Tenant Negligence and Lack of Maintenance

Tenant negligence and a lack of maintenance can contribute to dirty properties, which can lead to disputes over cleaning expectations and tenant responsibilities.

This kind of negligence can manifest in many ways, such as ignoring basic hygiene practices that leave your kitchen and bathroom in unacceptable condition or delaying minor maintenance issues like leaky taps or blocked drains. Often, you may not even realise that not reporting these problems can exacerbate the situation, leading to greater damage and more expensive repairs further down the line.

To fulfil your responsibilities and keep your living space safe and pleasant, it’s a good idea to regularly check your home, promptly report any maintenance concerns, and take a proactive approach to cleanliness.

Simple steps like creating a cleaning schedule and maintaining open lines of communication with your landlord help ensure a harmonious living environment.

Preventing Deposit Deductions

Preventing deposit deductions starts with communicating with your landlord or tenant about cleaning standards, responsibilities, and rental policies. Setting clear expectations right from the outset can minimise misunderstandings and avoid disputes over the property’s condition when the tenancy ends.

Keeping the lines of communication open about maintenance and cleanliness helps maintain those standards throughout your rental period.

Effective Communication and Expectations

Effective communication and setting clear expectations are key to understanding your responsibilities regarding cleanliness standards and property maintenance.

This solid foundation helps you avoid misunderstandings and builds a positive relationship with your landlord. Regular check-ins are an excellent way for landlords to discuss specific expectations for property upkeep, address any concerns you may have, and share tips on keeping things tidy.

Encouraging open dialogue allows you to voice your needs or any issues you encounter, promoting a spirit of cooperation. Feeling supported and informed makes you more likely to take responsibility for your living space, which helps minimise disputes and creates a harmonious community atmosphere.

Handling Dirty Properties as a Landlord

Dealing with dirty properties as a landlord means taking a proactive approach to cleaning and repairs. It’s all about making regular property inspections a priority and keeping the lines of communication open with your tenants.

Steps to Take for Cleaning and Repairs

To keep your property in tip-top condition, you can take specific steps for cleaning and repairs that promote effective maintenance.

Start by creating a comprehensive checklist that helps you establish a routine. This should include regular inspections, promptly addressing minor repairs, and maintaining good hygiene. Taking this proactive approach creates a healthier living environment for your tenants and reduces the chances of facing bigger, more expensive issues down the line.

For example, routine gutter cleaning, HVAC system checks, and monitoring mould growth can prevent larger problems that might arise from neglect. Plus, if you document these practices and schedule them in advance, you’ll have a more organised management plan, ultimately boosting tenant satisfaction and extending the life of your property.

Uncategorized
Moving Out Cleaning In Spots You Usually Ignore

If you want to get your deposit money, you have to do the end of tenancy cleaning right. As you may have gathered, this process goes way beyond what you’d usually do to get your place tidy and hygienic for everyday life. It even goes beyond what you’d do by way of cleaning if you’ve got visitors coming. During the end of tenancy cleaning, you have to get into places that you normally wouldn’t tackle.

Deep Cleaning Your Property Prior to Vacating

This is because Archway landlords and the people who are going to move into what was your old rental home will want somewhere that looks sparkly and fresh rather than dingy and a little shabby (which differs from shabby chic – and that’s not to everybody’s taste anyway). Just think about what you’d want to see when you moved into a new place or took your first look around it.

Landlords Look Through Different Eyes

The thing with end of tenancy cleaning is that you’re used to the limescale on the taps or on the tiles in the bathroom. It’s part of the patina of everyday life, and if you’re cleaning the bathroom, you tend to focus on the gunge in the soap rack and the splatters of toothpaste on the mirror. However, when the landlord or a prospective tenant comes in, he or she sees the place with fresh eyes (yes, even the landlord). What’s more, there are no other odds and ends to attract attention, so the eye just zeroes in on the bits of dirt.

It’s easy to forget this fact – after all, when you’re moving out, you’ve got a truckload of things to think about. This is one reason why many people like to call in a professional end of tenancy cleaning service to get rid of the hassle. Landlords also like it, as they know the job’s been done right.

With end of tenancy cleaning, you need to get into all the odd spots that normally get overlooked. If you’re game enough to do your own moving-out cleaning, then these are some that you really can’t ignore. But what are all these odd spots? Here are some of the ones on the end of tenancy cleaning checklist that we use in our business in N19.

Check Your Tenancy Agreement for Any Cleaning Clauses

Do You Have These On Your End Of Tenancy Cleaning Checklist?

  • The front door. Most people, when they clean, tend to concentrate on what’s inside the house. The outside tends to be ignored, apart from maybe the windows. However, the front door picks up its fair share of everyday grime and dirt. Yes, it’s a cliché, but first impressions count, and the front door is the first thing the landlord will see. This means that you need to give the door handle a good polish, and the door’s surface will need a good wipe, especially if it involves moulding. If you’ve got a letterbox slot in your door, don’t forget to clean this as well.
  • Skirting boards. Dust collects everywhere that’s horizontal, including all the horizontal elements in your walls, such as skirting boards. Dado rails and architraves come into the same category. They’re often overlooked during general cleaning, but if there’s no furniture to hide the skirting boards, then any dust and grime will show up only too easily. The good news if you’re trying to do your own end of tenancy cleaning is that if it’s just dust on your skirting boards, then the upholstery attachment or the crevice tool of your vacuum cleaner can remove this.
  • Taps. Limescale builds up on taps very easily in hard water areas or when the water is chlorinated (which is most of the time unless you’re lucky enough to somehow be on a rainwater or natural spring for your water supply). All this has to go to ensure that the taps are sparkling clean and ready for inspection. This may involve getting stuck in with an old toothbrush to get into all the fiddly bits and pieces.
  • Behind the furniture. If you own the furniture, the dust bunnies and other debris that will inevitably have collected behind it will become obvious when you shift the furniture out (so that’s where that other earring went!). However, if you rent a furnished flat or house in Archway, you may be tempted to leave the furniture in place. Don’t do this. There’s a good chance that the landlord will move it and check behind it, and your lack of cleaning will be exposed. Move your own bits out, then pull the furniture that came with the house or flat, out into the middle of the room and get in behind it. If one of the furniture items is a sofa, don’t forget to pull off the cushions and vacuum underneath them (and there’s the other missing earring, a teaspoon and a very dodgy old crisp).
  • Inside the oven. And outside the oven and in the range hood as well! Unless you’ve never used the oven at all (like that’s going to happen!), there will be smuts, bits of grease and old burnt raisins (well, that’s what they look like) inside the oven. It’s not an easy job cleaning an oven, and plenty of people just ignore it until they move out. Sometimes, folk hire professional end of tenancy cleaners in Archway just to take care of the oven. One handy hint I learned from an electrician for cleaning an oven is this: if there’s grease and muck on the element itself (in the case of an electric oven rather than a gas oven), don’t fool about trying to wipe it off. Just open the windows and doors, turn the extractor fan on and switch that element on fully. This will burn off the grime. It will smell and may set off your smoke alarm, but it will remove the grease.
  • Light fittings. We usually only stare at light fittings if we’re lying in bed ill unless we’ve got a nice fancy light with pretty sparkles or coloured LEDs that do more than just illuminate the room. Because we usually don’t look at the light fittings and because they’re high up, they tend to get dusty very easily. During moving-out cleaning, you’d better grab your ladder or a step stool or a very sturdy chair and get up there to clean them up. Lampshades also need to be dusted, which can be a very fiddly job in some places. In the case of incandescent bulbs that have collected fly spots and dust, don’t bother cleaning them. Just replace them with new ones instead – it’s a lot quicker and easier!
  • Door handles. Usually, only germophobic people are the ones who fanatically clean door handles inside the house. Well, that was the case until the COVID-19 pandemic turned the lot of us Archway folk into germophobes who wiped doorknobs all through the house. If you take a close look at a doorknob, you’ll see that it will be a bit grimy from all the fingers touching it. This means that you’ll need to give them a good clean when you move out.
  • Towel rails. Towel rails just sit there with your towels on them, and you tend to be more concerned about whether or not the towels on them need to be changed or not. However, they can collect dust, obscure bits of shampoo or soap (well, that’s what I hope that slightly greasy stuff on them is) or even limescale over time, which will all need to come off during the end of tenancy cleaning. Don’t forget to pay attention to the place where the towel rail is fixed to the wall as well as to the main bar of the rail itself.
Hard to Clean Areas That Often Get Missed During End of Tenancy Cleans

Hiring a Professional End of Tenancy Cleaning Company in Archway – Is It Worth It?

End of tenancy cleaning requires detailed knowledge and precise skill. Professional companies have the specialised personnel, supplies and equipment to tackle even the most challenging of cleaning jobs.

Trained professionals understand the nuances of end of tenancy requirements, ensuring that high standards are met at all times. They use sophisticated cleaning solutions and products that can tackle tough stains without posing a risk to anyone in the vicinity. Professional end of tenancy cleaners use industry-leading technology for superior results without wasting time or supplies. Eco-friendly practices are used to protect your property and maintain a safe environment for everyone.

Hiring one company saves stress and hassle by covering every nook and cranny, from airing bedrooms to washing windows or degreasing ovens. You can be assured that no dirt is overlooked or left behind whatsoever — helping your rental property look as good as new!

Go on, give us a ring and sort out a thorough end of tenancy clean at your Archway property.

Random Musings Of A Bored Tenancy Cleaner
The Things At Home We Clean Too Often

Yes, the order and cleanliness of the home are essential. Not only because of the guests but also our personal mental and physical health. And because of the discipline and the feeling of comfort. However, there are some places and things in the home that we go a little overboard. See which items don’t need as much care.

Kitchen cabinets

It is not good for them to have a lot of moisture, and their cleanliness is very easy to maintain just by wiping with a microfibre cloth or, at most, with a sponge and water. Once a month is enough, and after the sponge and water (and maybe a few drops of detergent), dry well.

Windows

With them, a maximum of two times a year would be enough. Otherwise, cuts and scratches will appear on them, and most window cleaners are harmful to the lungs. If they are very, very dirty, use a more powerful detergent.

Pillows

Frequent washing of pillows will make them lumpy and thin their tissues. It is best to wash them for at least six months and let the pillows air out the rest of the time.

Swimwear

Summer is when we wear our swimsuits, but washing them is more urgent than we think. The washing machine can stretch them irreversibly and give them a rather naughty look. Wash the swimsuit with cold water, and even soak it for about half an hour. It can be washed every 2-3 uses gently by hand with a bit of detergent.

Jeans

That makes many people think: How often do you wash your jeans? The truth is that they do not need so regular washing. Experts say we can wash our jeans as soon as they smell, no matter how nasty they may sound. Frequent washing thins the denim, which causes wear, bleaching and subsequent tearing.

You cannot avoid household cleaning, so let’s do it more efficiently

Performing cleaning tasks requires a good dose of effective cleaning materials and hard work.
If there is a thankless job, it is undoubtedly cleaning at home. However, this is housework that, whether we like it or not, must be done to live on a certain standard of cleanliness, which most of us do. Fortunately, we no longer have to rely on a lot of rubbing because products on the market make the task as easy as possible.

The more important things

A small step towards improving the appearance and health of your home is to indulge in the routine of cleaning and maintaining your carpets.

Choosing a carpet cleaning method can be confusing. Every retailer or carpet cleaner may have a different recommendation on the best available carpet cleaning method.

There are several types of cleaning processes using modern equipment. They are the ones that are recognised more often by leading carpet manufacturers and specialised carpet cleaning companies.

The low moisture extraction process

This method is sometimes also called steam cleaning. , the cleaning solution is mixed with hot water and used as a fine spray in this method. That releases the dirt due to the heat and spraying of the solution, drawn out by powerful vacuums. The next step is drying, which can take about a few to twelve hours, depending on the carpet fibre and the cleaning equipment used.

Steam extraction method

If the carpets are heavily soiled or subject to the whims of children and pets at home, the most preferred method is the steam extraction method. In this method, high-pressure steam cleaning machines inject steam jets mixed with the cleaning solution into the carpet fibres. Then the carpets begin to separate dirt from the fibres; on the other hand, a strong vacuum immediately removes all the dirt and moisture. This type of cleaning also eliminates odours and even kills bacteria and dust mites.

Foam extraction technique

Foam extraction is a popular carpet cleaning process widely known as carpet shampoo. Here, a foam-based detergent is applied to the carpets and rubbed into them with a motor brush. That frees the soil from the carpet fibres. After the carpet and foam are completely dry, the remains and dirt are cleaned with a vacuum cleaner from the carpets.

Cover cleaning procedure

Cleaning the top is a wet process. The cleaning solution is mixed with carbonated water and applied in this method. Afterwards, a rotating machine or a cover for spraying the detergent is activated. An absorbent pad is then used to remove stains and dirt. The dirty absorbent pad is replaced repeatedly with a clean one until no more dirt is visible on the pad.

Many professionals in the industry adopt these carpet and upholstery cleaning techniques. So to achieve proper, deep cleaning, choose a company that uses some of the best cleaning techniques.

Did you know?

The carpet cleaning method should be based on the carpet manufacturer’s recommendations. If you do not use the carpet manufacturer’s recommended method, they may void the carpet warranty. When choosing a carpet cleaning method, review the warranty information before hiring a carpet cleaner.

Whether you clean it yourself or hire someone, it helps you understand the standard carpet cleaning methods. Despite all the terminology, they fall into two main approaches: dry carpet cleaning and wet cleaning.

Random Musings Of A Bored Tenancy Cleaner
The Dirtiest Things We Often Forget To Clean

In our hectic lives, we ignore the little things in our homes or office that need our attention. But at some point, they remind themselves differently by stopping working properly or unpleasant odours around them.

Here is a short list of the dirtiest things we must clean but ignore:

Purses

Purses become extremely messy if neglected for too long.

Most women wear purses these days, but do they clean them? Aside from throwing away old receipts and random pieces of gum, most women rarely pay attention to their purses. Especially where they put them.The outer surfaces are the dirtiest. Think about how often you leave your bag on tables, benches, seats, etc. Imagine all the germs you collect and then transfer to the car seat when you leave your bag.

Worse, you probably put it on the kitchen counter or side table when you get home. Wipe the outside with a microfibre soap disinfectant and refrain from placing it on any surface in your home. Place a hook to hang your bag and keep it away from tables, chairs and counter tops. You should clean your purse every week, if not more often.

Empty everything and wipe the inside with a disinfectant cloth. Then wipe the handle and the entire outer surface with another cloth and set it aside to dry.

Remote controls

Let me tell you how polluted a remote control can be. We had one that stopped working correctly, and when I disassembled it to fix it, I realised how disgustingly dirty it was. There were stains of dirt all over the outside of the remote. And the reason it didn’t work properly as it had stuck so much garbage.

I had to disassemble the remote and use a toothbrush and toothpicks dipped in disinfectant to remove all the dirt. Then I wiped the surface, let it dry and put everything back together.

It worked like brand new. I now wipe it with a disinfectant towel every week during my weekly cleaning and clean up any noticeable residue with a toothpick.

Several times a year, I disassemble it and clean it around the buttons.

Phones and personal electronics

Most people are on their phones most of the day. Still, how often do you see someone clean their phone?

When was the last time you cleaned yours? I’m not talking about wiping the screen so you can see through your fingerprints. I mean, really cleaning your phone.

Remove the cover and see all the dirt. Wipe it thoroughly, ensuring you cover each part at the inside corners of the box. Set it aside to dry. Put it in order and use it again.

You should clean the outside of your phone daily, remove the case and clean the hidden areas once a week.

Computer keyboard

In the world of digitalisation, we widely use computer keyboards. With this use, all small particles fall between the keys.

Depending on the frequency of use, you should spray the keyboard with compressed air once a week to clean up any debris. You can use a paintbrush or toothpick to remove everything between the keys. Then wipe the keys and flat surfaces with a disinfectant cloth.

Clean your home keyboard once a week. If you share a computer at work, clean it every day.

Coffee machine

Clean the coffee machine regularly to avoid poor taste.

If you drink a lot of coffee, your coffee machine can get dirty. Dirty coffee machines do not work well and can affect the taste of your coffee.

One morning my husband, pouring himself another cup of coffee to wake up, told me that his coffee did not taste as good as expected. Then he poured it into the sink, and since I don’t drink coffee, I asked him when he last cleaned the coffee machine. He did not answer and went to the other room, angry.

Hard water and mineral deposits accumulate in and around the water tank, and oils and grain residues stick. I immediately searched for information on the Internet about cleaning coffee machines, and I am sharing it with you here:

Take the water tank out and fill it with water and vinegar in a ratio of 50:50. But if you are intolerant to the smell of vinegar, you can squeeze 1-2 lemons and replace the vinegar without any problems.

Return the filled tank and run the coffee machine on an empty cycle. If you have a jug, leave it to collect the solution. If you don’t have one, put a glass or a bowl.

When the tank reaches the middle, stop the machine for about 1 hour to clean it well. Then re-release it.

Now, fill the tank with water and run 2-3 empty cycles to remove the vinegar residue.

If you have a removable filter, you can also clean it with soapy water to ensure it is 100% clean and disinfected.

After you have taken care of the coffee machine’s inside, it is also time to clean it outside. Exterior cleaning is even easier. Clean it with a sponge, but not the abrasive part and a little dishwashing detergent. Then wipe it with kitchen paper or a microfibre cloth.

Cleaning takes 15-20 minutes, but you can enjoy a warm cup of aromatic coffee!

Toaster

Usually, when we clean the toaster, many crumbs fall off, so take it over the sink or a piece of newspaper. If your toaster has a crumb tray, remove it and discard the crumbs. Otherwise, turn it down and shake it vigorously to pour the crumbs accumulated inside.

  • Take the toaster crumb tray and fill it with hot water. Add a few drops of dishwashing detergent. Leave to soak for 15 minutes and wash with a sponge. If there are stubborn stains from soot, smear them with a thick baking soda and water paste and rub them well. After rinsing the tray, let it dry completely before returning it to the toaster.
  • Use a small brush to reach the jammed crumbs inside the toaster. Brush well and use a vacuum cleaner to clean the crumbs inside.
  • Immerse the sponge in warm soapy water and wipe the toaster outside. Be sure to rub the buttons. They are usually dirtier.
  • Dry the surface of the toaster with a clean, dry cloth. If the toaster is made of metal, dip the towel in a bit of vinegar – this will polish the surface, and the toaster will shine.
  • Put the crumb tray back in place.
    Ready! The toaster shines again!

These are just some of the things. There are many others, such as fans, curtains in the bathroom, pet plates, dishwasher, washing machine, vacuum cleaner, walls around the toilet, etc. With more vigilance and observation, we will also be able to cope with these tasks.

Uncategorized
What Is Urgent Tenancy Cleaning?

After almost a decade in the tenancy cleaning business, I still get amazed by how clueless people can be about their lease contracts, moving-out procedures, etc. In my experience, at least 50% of the tenants think they can just pack their boxes, leave the keys on the kitchen table and move on to their new apartment. The idea of reading their tenancy contract, let alone planning for a professional cleaning visit which is a mandatory condition more often than not, does not cross their mind.

Let me give you an example. A few weeks ago, I was enjoying my first cup of morning coffee when the phone started ringing. Without knowing it, I could guess it was an emergency call – nobody would contact us for a pre-scheduled clean-up at 9 AM. When I picked up the receiver, I was immediately exposed to a torrent of hardly understandable vocal abuse in a strong Eastern European accent.

As it turned out, a Hungarian lady was moving out of her Whetstone apartment but, of course, hadn’t read the tenancy contract. She should have cleaned the apartment a day before the call – or lost her deposit. In something between panic and rage, she demanded (the cheek of this woman!) we take the job on the same day, for extra pay (how generous!).

I am usually very accommodating with my customers and try to help them in similar cases. But something in this lady’s tone put me off immediately. I tried to explain that we could sign her up for a clean-up in the early evening of the same day, which is more than a reasonable timeframe. She would have none of it – the cleaning had to be done by noon, or she would lose her deposit. Well, I guess she lost her deposit.

Please, please, please – guys, read your tenancy contract! And if you fail to do so, do not forget it is your fault, nor a professional contractor’s!